Large software projects are hard to manage, since they are usually built out of many independent smaller services and libraries. The research has shown that the high performing organizations are twice as likely to exceed profitability, market share and productivity goals 1. They are able to iterate on the features faster as well as detect and prevent problems before they get deployed to the customer.
The key part to their success lies in increasing the number of product deploys per day. Since large products consist of many dependencies that has to be built in a specific order, maintaining such a build pipeline often gets very tedious and time consuming. One way to manage the complexity of your build pipeline is with a well known automation server - Jenkins and its suite of plugins.
In this guide we will show you how to use the Jenkins’s DepBuilder plugin in order to create a large continuous integration/continuous delivery pipeline for your product.
Scenario
Let’s say our project is a fairly typical enterprise product that consists of:
- Middleware library
- Desktop application
- Backend server
Since the desktop application and the backend server are both depending on the middleware library (middleware library is their dependency), our desired Jenkins build pipeline would look like the following image:
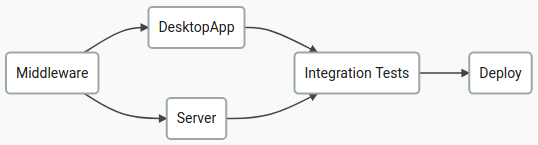
Each of the nodes in the build pipeline above represents a Jenkins job that triggers a build script pulled from the project’s respective version control system (the usual process for building a project on Jenkins). Once you have the build projects defined, you can wire them together into the desired build pipeline.
With DepBuilder plugin the steps for defining such pipeline would be:
- Create a new DepBuilder project
- Write the pipeline script
- Run the build
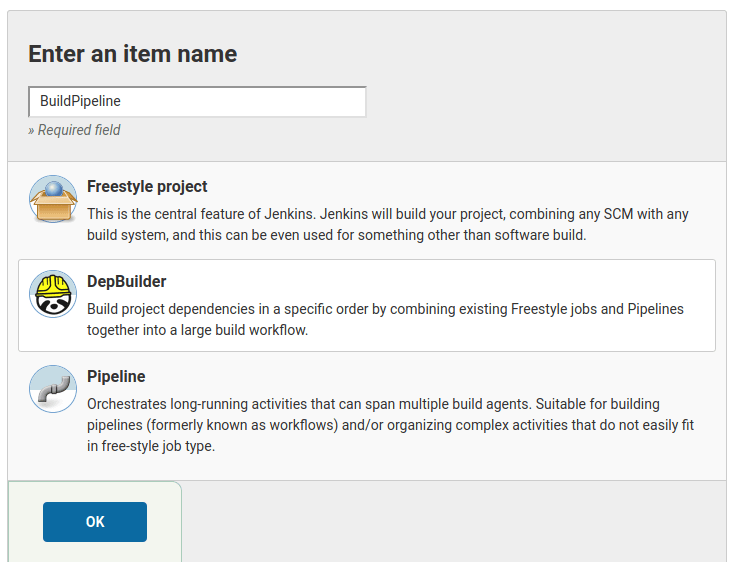
1. Create a new DepBuilder project
On the main Jenkins dashboard click on the New Item menu in the left sidebar, select the
DepBuilder project and chose an unique pipeline name.
2. Write the pipeline script
The pipeline script should be written in the DepBuilder’s domain specific language (DSL), that allows you to easily connect existing Jenkins jobs into the build pipeline. The DepBuilder DSL is very strict and follows the Fail Fast philosophy 2.
The pipeline script will be checked for mistyped job names, missing build agents, cyclic dependencies, typos and other preventable problems before attempting to run the long build process. This allows you to focus on writing/refactoring the pipeline script without worrying about breaking your build due to the typo discovered late into the build process. If the script is valid, your build pipeline works.
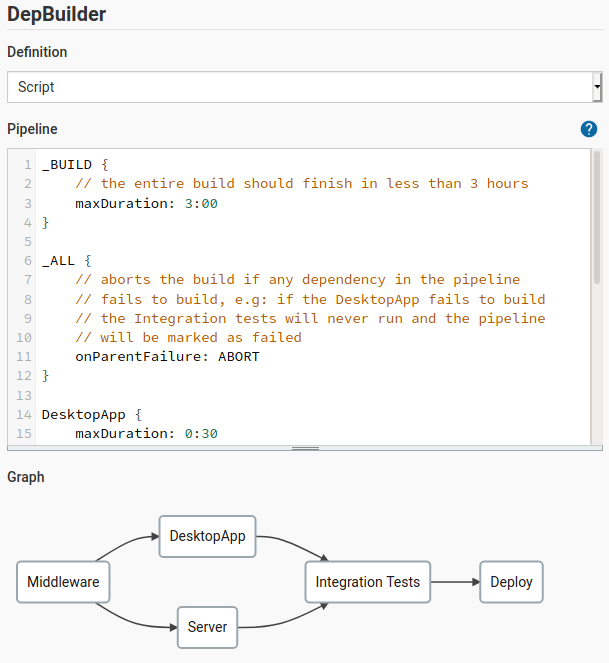
The DSL script is validated every time script input box looses focus and you will be warned about any problems that the build script has. The graph below the script input is also refreshed and is displaying the current state of build pipeline as defined in the build script.
The full DepBuilder script for our example is shown below:
_BUILD {
    // the entire build should finish in less than 3 hours
    maxDuration: 3:00
}

_ALL {
    // aborts the build if any dependency in the pipeline
    // fails to build, e.g: if the DesktopApp fails to build
    // the Integration tests will never run and the pipeline
    // will be marked as failed
    onParentFailure: ABORT
}

DesktopApp {
    maxDuration: 0:30
    agent: [windows_runner]
}

Server {
    // The build will run on one of the specified runners.
    agent: [linux_runner1, linux_runner2]
    // The Server project will try to build even if the
    // Middleware project build fails
    onParentFailure: BUILD
}

Middleware -> DesktopApp -> "Integration Tests"
Middleware -> Server -> "Integration Tests"
"Integration Tests" -> Deploy
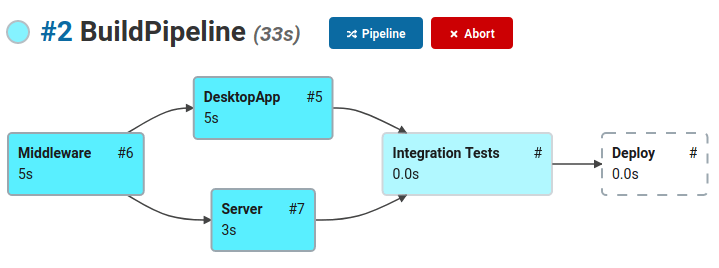
3. Run the build
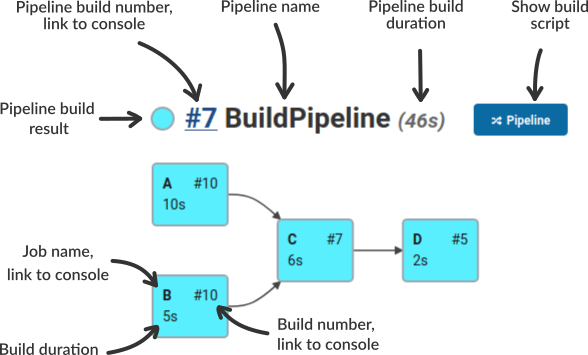
After running the build of the created pipeline, you should be able to follow the progress of the build on the pipeline’s dashboard:
Need to speed up your pipeline build?
Upgrade to DepBuilder Pro in order to automatically parallelize dependency builds and speed up your build with no additional changes to your pipeline script.
That’s it
You have successfully set up a build pipeline with multiple dependencies on Jenkins. To learn more about the DepBuilder features, make sure to check out:
Notes
From The Devops Handbook, page xxxii ↩︎
In system design, a fail-fast system is one which immediately reports at its interface any condition that is likely to indicate failure, learn more at Wikipedia. ↩︎